GeoFli is super simple to implement for the average user on an average day (or even a stressful day). But “hard coding” the GeoFli script into your website can be made even easier using Google Tag Manager.
Another bonus? Delegating GeoFli is even easier, and you never need to bother your web team to GeoFli more pages.
Creating The GeoFli Tag
Click “Add A New Tag” from the GTM dashboard.

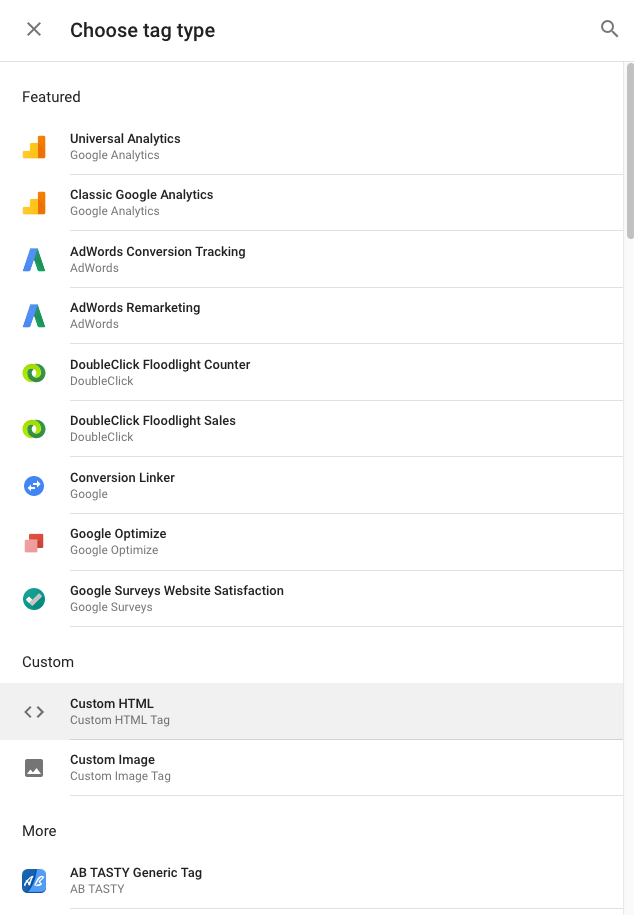
Choose a new tag type to begin setup. GeoFli uses a custom HTML tag, so choose that option under “Custom”.

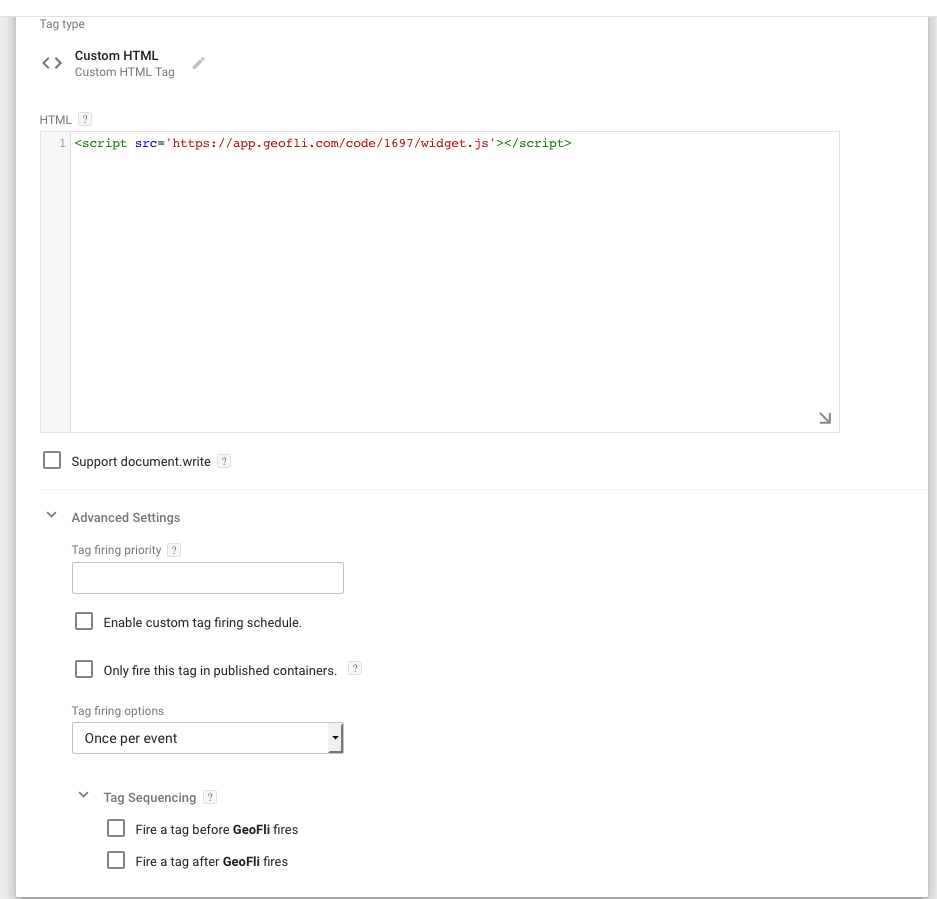
In the HTML block, paste the GeoFli script for the page you’d like to GeoFli. Find the script by clicking on the orange “Make It Live” button on the page’s dashboard in GeoFli.

Trigger the New GeoFli Tag To Fire
Now we set the trigger to answer the question “When will GeoFli fire?”
Since this GeoFli script, or pixel, is associated with the page “Home Page” in GeoFli, we’d like to set the trigger for the pixel to fire only on the home page.
If we didn’t do this, and the same GeoFlied page area existed on other pages across the website, all of those page areas would GeoFli in the exact same way. In many cases, users want to avoid this from happening.
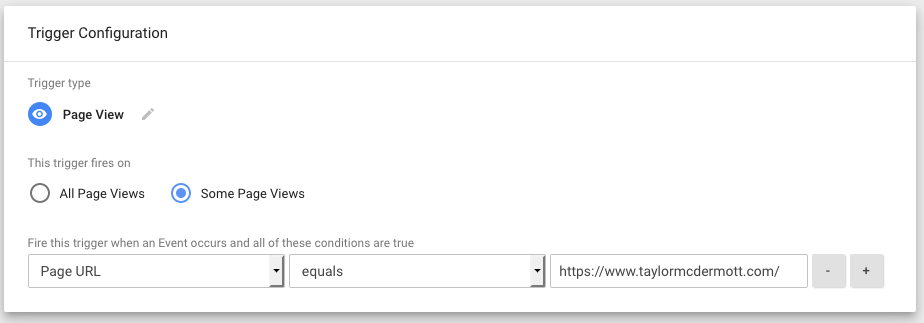
Create a new trigger, and set the trigger type to “Page View”, and specify that we want this tag to fire on only Some Page Views.
Set the trigger to fire in the event that the “Page URL” that is viewed “equals” the URL of your home page.

*Note: if GeoFli is not responding, you may want to test the filter “Page URL CONTAINS” instead of “equals.”
Click “Save”. You can preview your changes to ensure there are no errors, and then publish, and GeoFli is live!
Moving forward, GeoFli users who are delegated the task will be able to add the GeoFli trigger without needing to communicate with a third-party web team to accomplish the small task of GeoFliing more pages.
Additionally, GTM allows you to test new tags using the “Preview” mode, so you don’t have to worry about accidentally breaking your site. Just don’t forget to leave Preview mode!